Brand Wings allows your sellers to easily share assets with current and potential customers. While helpful, there are times when your sellers may want to provide an organized and professional collection of sales-supporting digital assets to a group of customers. With our latest release, this is now possible with our new feature called Customer Spaces. Let's take a look at how to take advantage of this.
To begin, you'll want to set permissions to allow users to take advantage of customer spaces. In Settings-->Sales Team Roles, select the role you want to enable and then click the Permissions tab. Check all the options for Customer Spaces:

Next, go in to the Admin Roles and also enable permissions for any roles you want to empower.
Customer Spaces are based on templates that you, as an administrator, first define. A template is a defined set of assets along with default notes and explanations you create. Think of this as providing a quick and easy starting point for your sellers. When you create a template, you will be able to define whether the seller can modify the list of assets you have selected and change the default text. In this way you can either tightly control how Customer Spaces are used or provide flexibility to your sellers.
To create a Customer Space template in the admin, go to Sales Tools-->Customer Spaces. Next, click the Create Template button. You'll be prompted to provide a name for the template and then be brought into the template administration page:
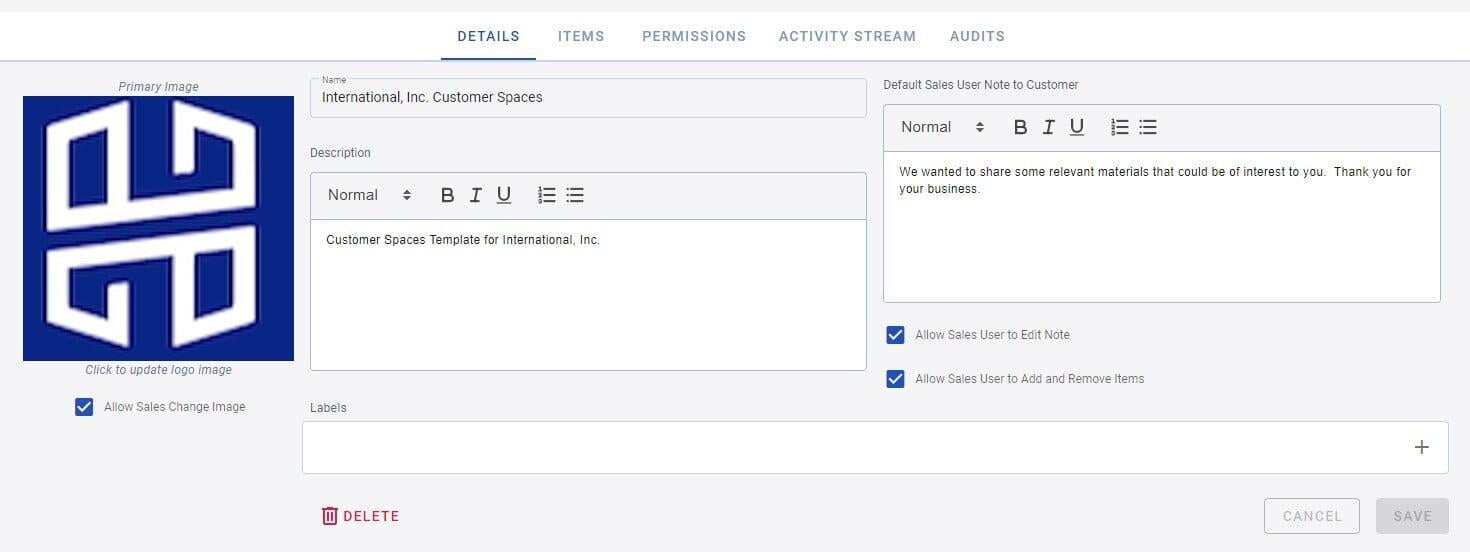
On the Details tab, you have a number of options:
- Primary Image: Upload an image that will represent the Customer Space template. The check box below it indicates if the seller can change this image you have provided.
- Name: The name of the Customer Space template
- Description: This description will be made available to your sellers, but will not be seen by customers
- Default Sales User Note to Customer: A Customer Space includes a note from the seller. You can provide some default content here. You can also indicate if the seller is able to edit this note.
- Allow Sales User to Add and Remove Items: On the next tab you will select which assets should be assigned to this Customer Space template. This checkbox indicates if the seller can change this list of assets you are defining.
- Labels: Like other sales tools in Brand Wings, you can set Labels that will be associated with this template.
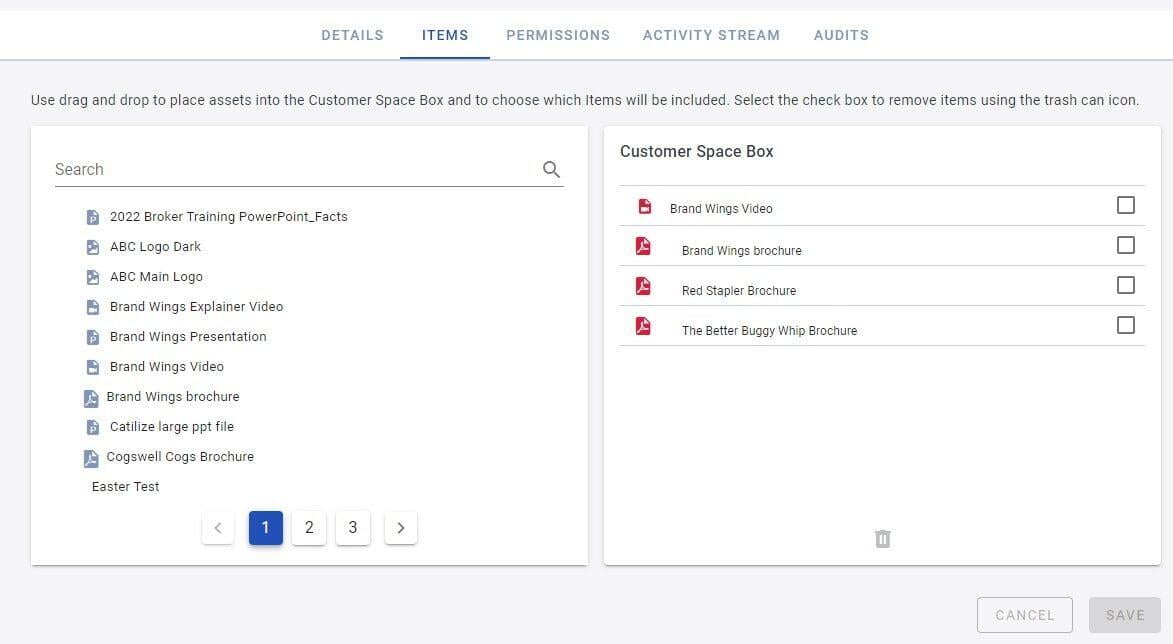
In this tab, you can find Assets on the left, and drag them into the Customer Space box on the right. Note that you can rearrange the assets in the Customer Space box by clicking and dragging.
Now click the Permissions tab:

Like other Sales Tools in Brand Wings, you can define which sellers will have access to this Customer Space template. You can select Roles and/or Sales Teams. Just remember that if both areas have selections, both must be true for the sales user to have access.
Remember to click Save when finished!
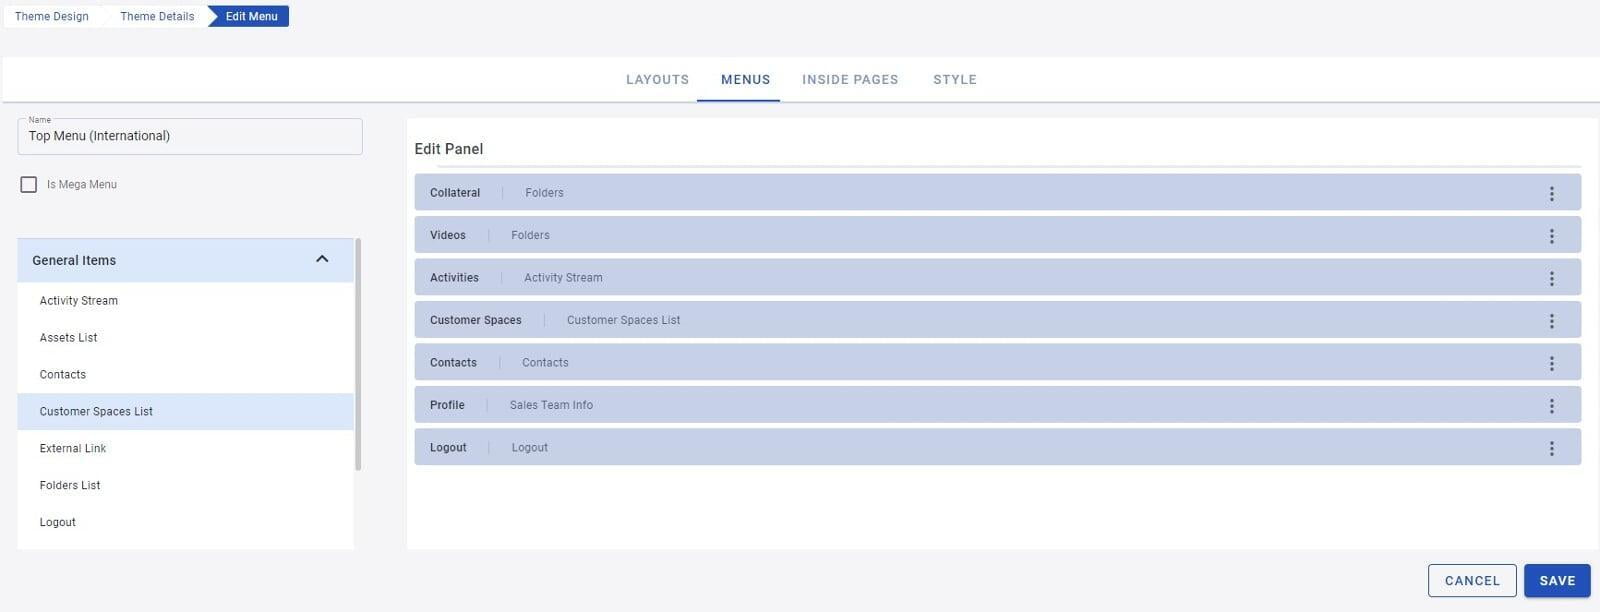
Now that you have defined a Customer Space, the next step is to make sure the sales portal is properly configured. First, you may want to add a navigation menu item that points to a list of all available Customer Space templates. Click and drag the Customer Space List from the General Items into the appropriate location on your menu:
Two other potential updates to make in the admin are:
- On the Inside Pages tab of the Portal Theme area, be sure to map a layout to the Customer Space type.
- Since customers can be notified about the customer space via email, you can also define a notification template. Be sure to use the {{Link}} Merge Tag in the template so that a URL to the Customer Space can be added to the email.
Sales Portal
Now that we have created a Customer Space template in the admin, let's review the seller experience. After your seller has logged into the portal, there are a few different ways they see and use the Customer Space templates you have created. If you added the Customer Spaces List menu item to a navigation menu, the seller can click (or tap) this link to see the templates:

Next, your seller can click on "See Details" for the desired template. This opens a detail page:

After reviewing the details, the seller can click the "Create New Customer Space" button to get started. This next screen allows the seller to customize the space (if needed) and share it with contacts:
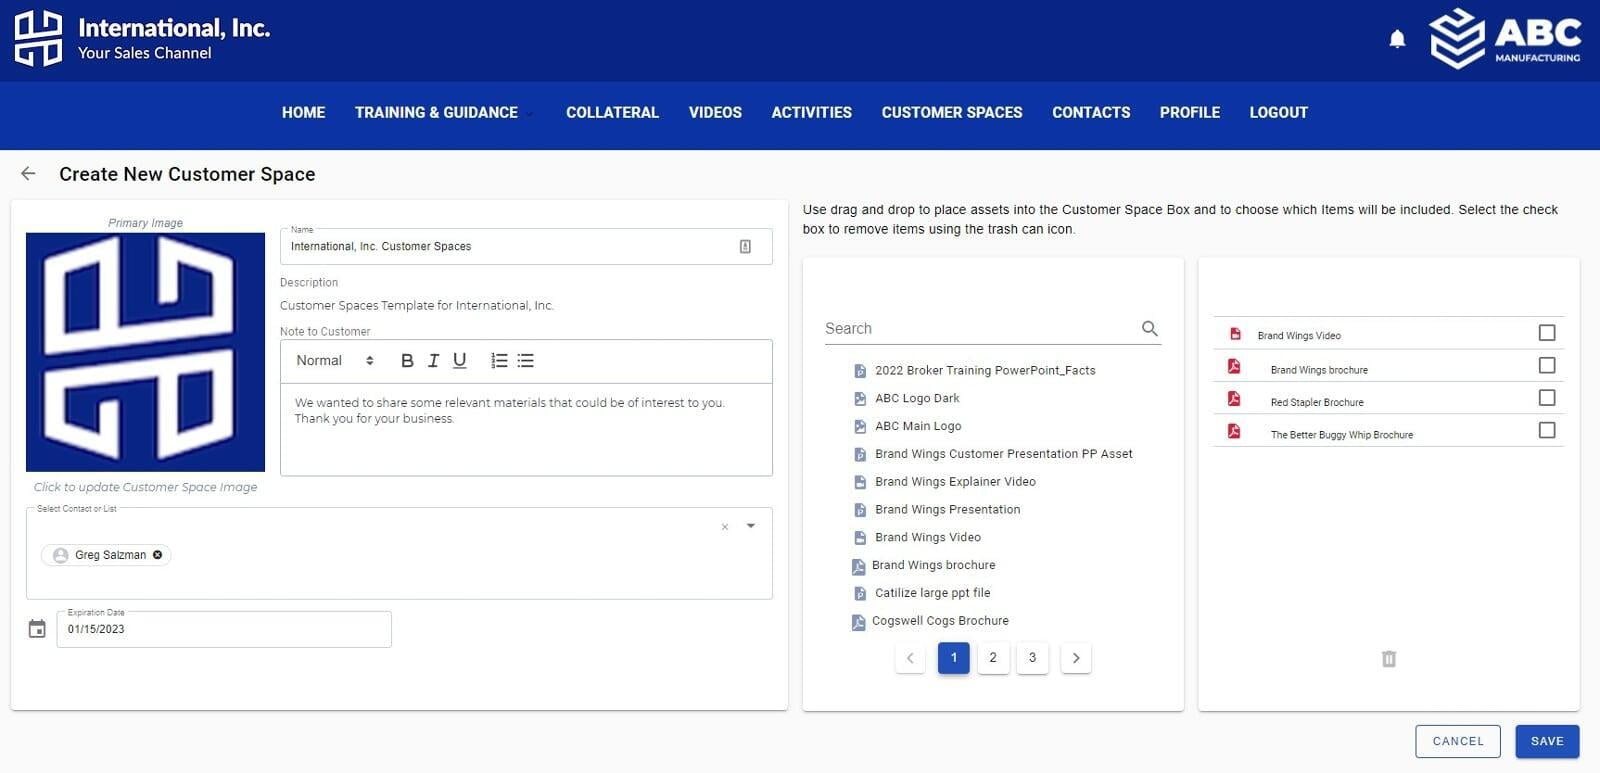
Depending on the permissions you set in the template, your seller has a number of options:
- Update the Customer Space name
- Update the image
- Update the note to the customer
- Add, remove, or re-order assets.
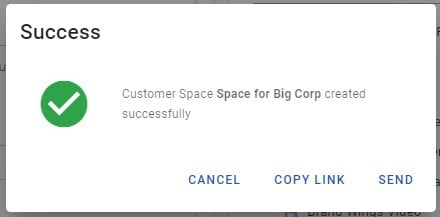
The seller can also select one or more contacts to send the customer space to (if desired) as well as an expiration date. When finished, your seller should click the Save button. Next, your seller is prompted to either send an email to the contacts or generate a link to the Customer Space:
The seller can access this Customer Space through the Activity Stream. By clicking on the detail icon on the right of the activity stream item opens a detail screen:
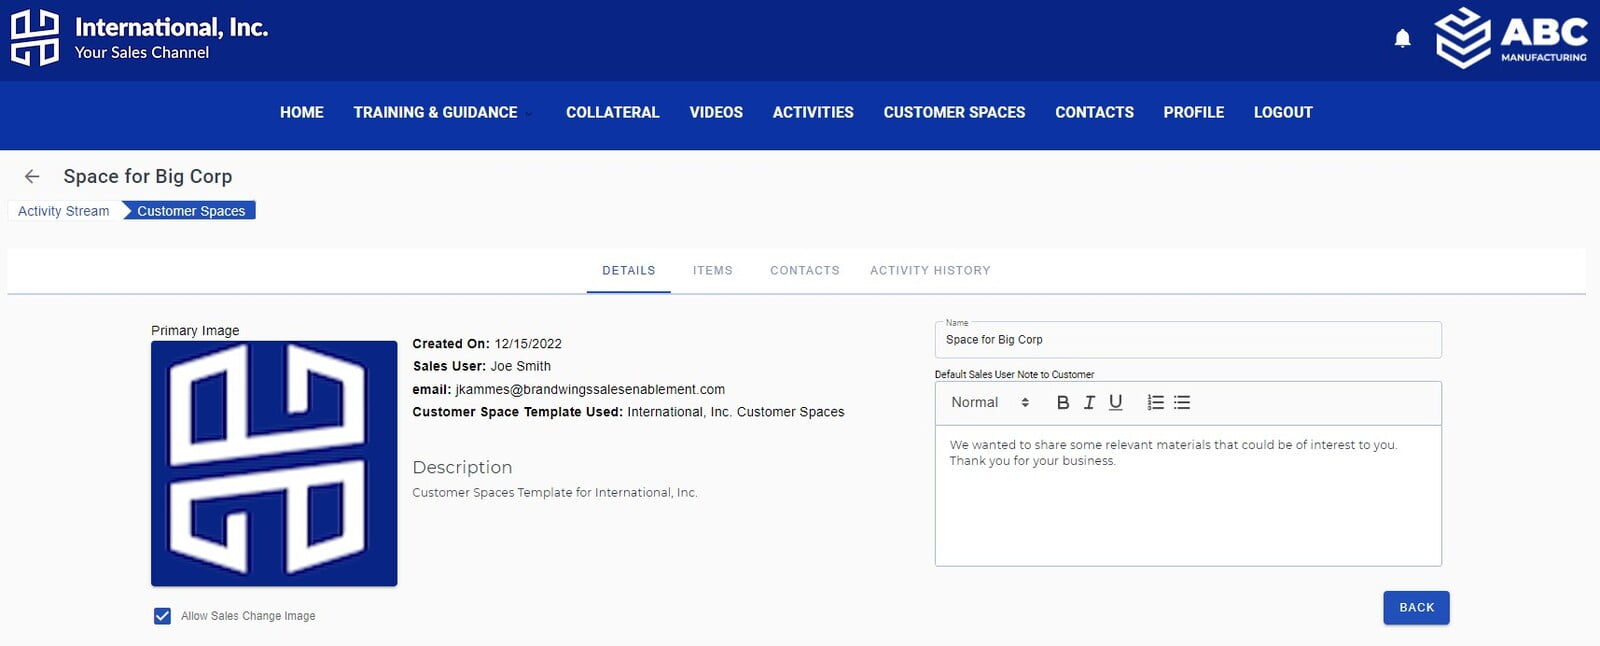
Note the tabs on this screen that include additional information:
- Items: List of assets in the Customer Space
- Contacts: The Contacts that have access to the Customer Space
- Activity History: Key events such as when Contacts visit the Customer Space
We hope you find this new feature useful for further enabling your sales teams!