Brand Wings allows you to create an unlimited number of portal designs to give your various partners and sales teams an optimal, on-brand experience in your Portal. We recently overhauled the portal designer to make it even easier to create beautiful and engaging portal designs. Let's take a quick look at the new designer.
Start by logging into the Brand Wings admin web application and navigating to Portal, then Theme Design. In the Layout tab, you can either select a layout to edit or create a new layout.
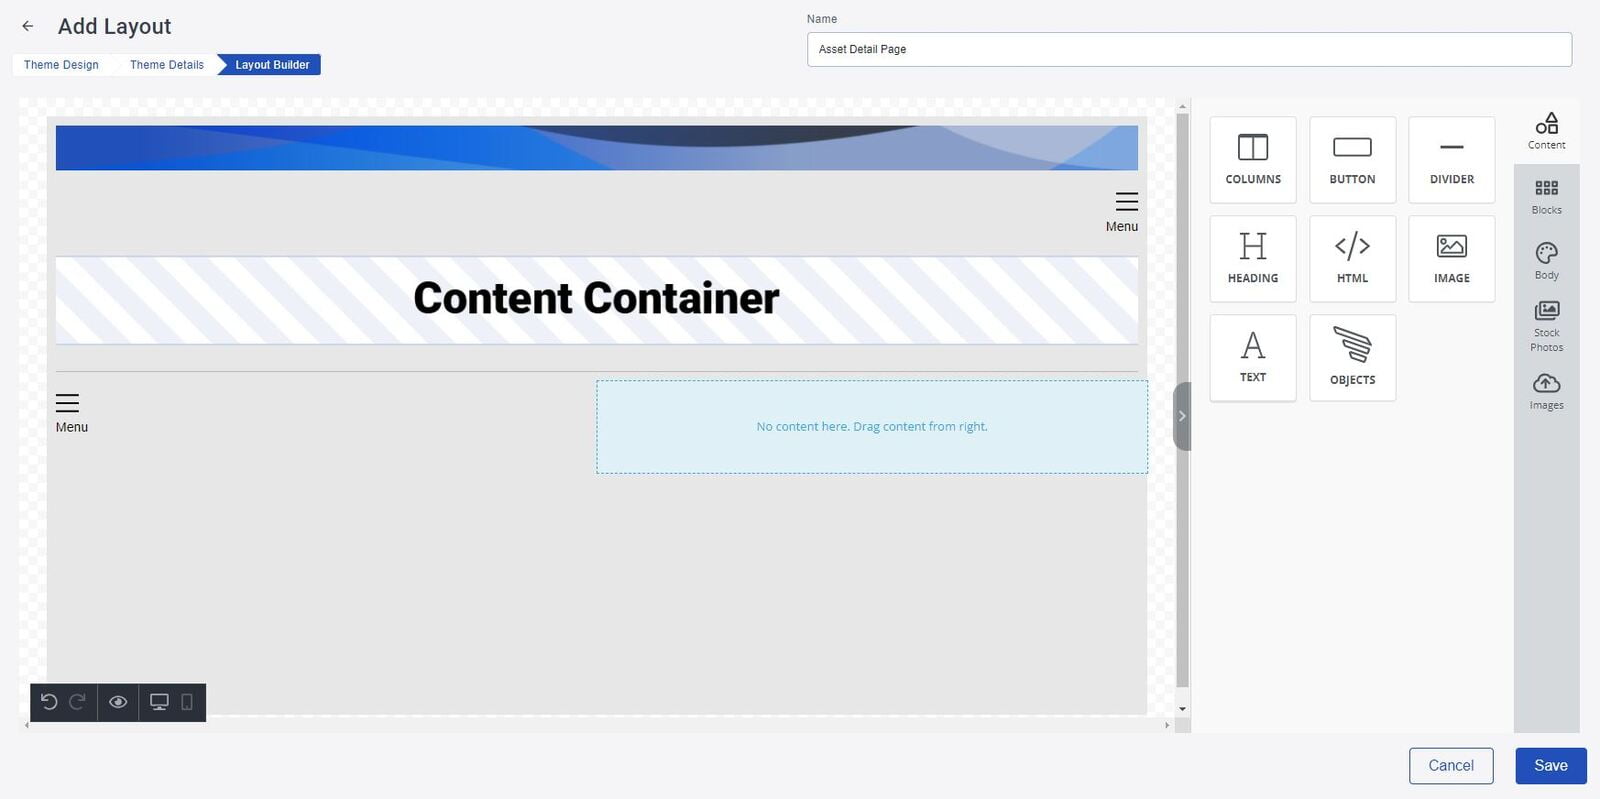
You'll notice a block on the design area on the left that says "Content Container". This is where Brand Wings will inject the content for the page. For example, if the layout is being used to show the details about an Asset, the Content Container is where the actual asset details will be displayed.
The new editor allows you to drag and drop different types of widgets from the panel on the right to the design area on the left. Options include:
- Columns: Add a single row of 1 or more columns
- Button: A clickable button that will redirect the user to a URL or page that you define
- Divider: Adds a single horizontal line
- Heading: Create Header text
- HTML: Add custom HTML to the design. This is helpful for widget scripts provided by 3rd party services that you want to add to the portal.
- Image: Allows you to upload and add an image to the design. As a bonus, this image will be saved in your library and can be reused on any other portal design or email notification
- Text: Create stylized text
- Objects: Adds a Brand Wings specific object, such as an image of an Asset or Template that you have defined. Keep reading below to learn more about this...
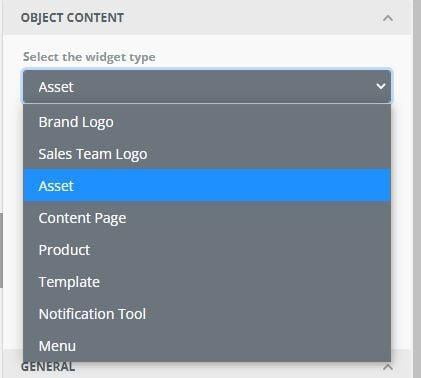
When you drag a Brand Wings Object onto the design surface, you are presented with multiple options in the Content area on the right. Select the type of object you want to use:
- Brand Logo: The logo for your brand or company
- Sales Team Logo: The logo for your sales logo. Depending on which partner the sales user belongs to, the logo will dynamically change for her. If the sales user is on a direct sales team, the Brand logo will display.
- Asset, Content Page, Product, or Template: Shows the image for the marketing tool. You can select which item to show and its size. The image will be automatically linked, so when a user clicks on the image he will be redirected to its detail page.
- Notification Tool: Shows a bell shaped icon indicating if the sales user has any pending notifications to read.
- Menu: Add a navigation menu to the design. With the menu object you can can place the menu and define which menu should appear.
This blog article only scratches the surface on what the new designer can do. Give it a try and let us know how we can help!